Tips for Capturing and Editing Christmas-Inspired Photo Shoots

Planning a Christmas photo shoot or wondering how to edit pictures for Christmas? As the festive season rolls around, cameras often kick into overdrive as we all try to document the magic of the holidays. From trying to capture the perfect family Christmas tree photo, to reducing the glare of snow, however; this season can prevent some obstacles when trying to capture beautiful end-of-year photographs.
Top 5 Tips for Your Christmas Photo Shoot
Whether you’re looking to take good Christmas pictures on your iPhone, DSLR, or any other camera device, the following tips have got you sorted. We’ll even reveal how you can perfect your Christmas photos during the editing process, thanks to our Photo Editor’s helpful tools and features!

1. Embrace Bokeh
Christmas is truly the best time of year for incorporating Bokeh into your photographs, as both fairy lights and snow can produce some stunning effects on camera.
To achieve bokeh naturally using a DSLR camera, try the following: Set your camera to A or Av mode (Aperture Priority Mode) and select the smallest possible aperture (f) number for your lens. Next, change your camera to manual focus and zoom your lens in to around the 50mm mark.
If you don’t own a DSLR or are simply finding it too hard to achieve natural Bokeh in your images, BeFunky’s Photo Editor can help you out. There are heaps of Bokeh textures to choose from, which will instantly give you your desired effect. In the Photo Editor, simply navigate to the Textures menu before selecting Bokeh.
If you want to blur backgrounds first, you can start in the Edit menu and use the Blur tool to make certain areas out of focus before adding in bokeh.


2. Reduce Reflective Light From Snow
Nothing quite says Christmas photo shoot like a snow-filled backdrop, yet capturing these wintery scenes can present some difficulties. Because snow and ice are both reflective surfaces, it’s not unusual for them to create intense glare within your photos, especially when captured on a bright day.
Thankfully, you can easily reduce this glare when editing your photos in the Photo Editor. The Fill Light tool (located in the Edit menu) creates a more balanced image by bringing down the highlights in your image, brightening the shadows, and keeping the mid-tones where they are.
Alternatively, you can manually adjust the brightness, contrast, highlights, and shadows within your photo using the Exposure tool.


3. Give Direction to Your Subjects
Forget awkwardly staged photos or over-posed subjects. If the people you’re photographing are feeling a little uneasy in front of the camera lens, provide them with direction so you can capture images that seem natural and at ease.
When planning a Christmas-inspired photo shoot, one of the most important things you can do is just to have fun with it. Therefore, tell your subjects to throw snowballs, blow confetti out of their hands, or have fun with sparklers. Those candid and playful photographs often become everyone’s favorite images.
When capturing movement in this way, there are a few technical things you’ll want to keep in mind. Your camera’s shutter priority mode gives you the best chance at capturing movement, while reducing potential blur. Additionally, continuous (Burst) mode is perfect for capturing a series of action-packed images—particularly if your subjects are doing any of the fun activities we mentioned above.
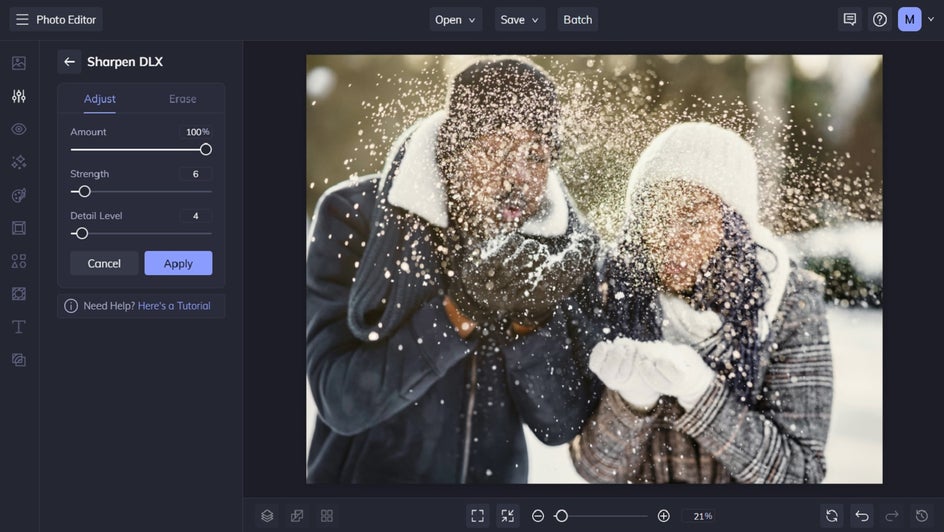
If your images are less-than-crisp, then you can fix this during the editing process. In the Photo Editor, simply use the Sharpen and Clarity tools, found in the Edit tab. You can also use Sharpen DLX to reduce blur and bring out finer details within your image, all within a single click.
4. Use Depth of Field to Capture Christmas Tree Photos
“How do you take family pictures in front of a Christmas tree?” It's a common question raised during the festive period—and for plenty of good reasons too. Considering your Christmas tree only gets decorated and set up once per year, it’s a pretty momentous occasion. The twinkling lights and eye-catching decorations also provide the perfect backdrop to your family’s annual holiday photo (which is perfect for placing on your festive cards).
The trick to a great Christmas tree photo, however, is to keep your foreground (your subjects) crisp and clear, while the background (your tree) is less prominent and slightly blurred. This effect is known as Depth of Field, and it’s the secret to creating a professional looking image.
Setting your f-stop to a lower value will make your aperture wider and your depth of field shallower, meaning the areas not in focus are blurrier. Increasing your f-stop will have the reverse effect; more of your image will be in focus. You'll need to adjust the f-stop depending on the size of your focal point subject.
If using your smartphone camera, try tapping on your subject in front of the Christmas tree to bring them into focus, while allowing the background to be slightly out-of-focus. Portrait Mode is also available on many smartphones. It allows you to change the depth of field while shooting, making the backdrop as blurry or as crisp as you like, while keeping your subject in sharp focus.
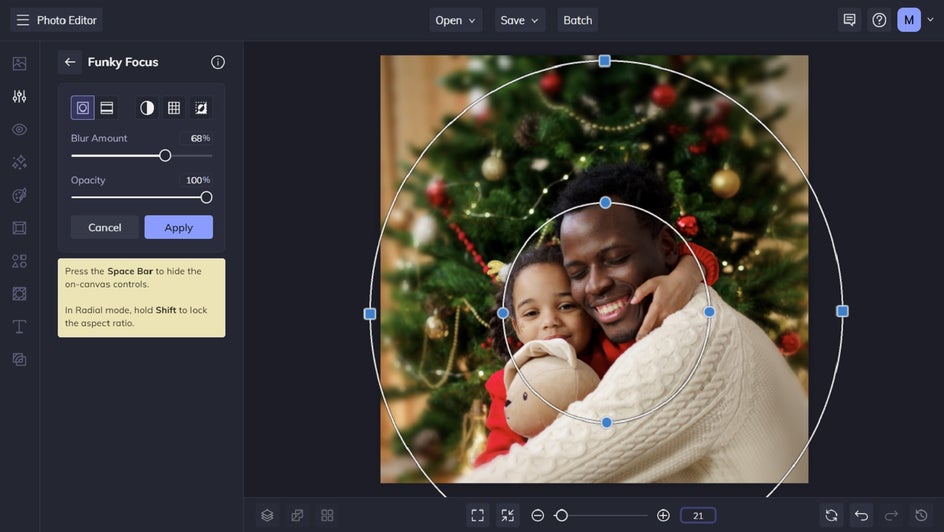
If you’re finding it hard to achieve the perfect depth of field, don’t fret. The Photo Editor has a handy tool called Funky Focus which instantly adds depth of field to your images during the editing phase.
5. Consider a Christmas-Inspired Flatlay
Your Christmas photoshoot doesn’t have to contain human subjects. Instead, why not embrace your favorite things about the holiday by capturing a flatlay?
A flat lay is a photo, taken from above, of several items arranged on a flat surface. They often capture a certain aesthetic, resulting in a single unified image from a collection of "random" objects.
Once you’ve gathered the items you wish to include in your festive flatlay, you’ll want to pay attention to your photo’s background as well. Add interest with texture, such as wood, faux fur, or velvet, for example. You might even consider keeping it simple with a plain-colored background instead.
When editing your Christmas flatlay, there are a number of tools in the Photo Editor which can come in handy. Use Crop to remove any unnecessary areas around your objects or the Exposure tool to ensure your brightness, contrast, highlights, and shadows are just-right. Additionally, the Clone tool (located in the Touch Up menu) is great for removing harsh shadows or even duplicating items within your photo.

Get Festive With Your Photography Shoot
Ready to take your Christmas photography to a whole new level? Get ready to experiment with new backdrops, camera settings, and poses like never before. Then, once you’ve finished capturing your imagery, head to BeFunky’s Photo Editor to turn your festive photos into perfect masterpieces.
Check out the Photo Editor today to see how great it is!