2 Easy Ways To Watermark Photos For Your Blog

Blogging takes a lot of work. Between the time you spend taking photos, using an image editor to make them look their best, writing all of the copy, and formatting it on your blogging platform, a typical blog post takes hours to put together. But when you hit the publish button, a wave of sheer satisfaction tends to eliminate your frustration and you’re ready to do it all over again. Why? Because blogging is meaningful, inspiring work.

But there are times blogging can be a little too inspiring. For instance, it’s not uncommon for another blogger or site to straight up copy and paste your work to masquerade as their own idea. You might find yourself in a situation where you see a beautiful photo you spent hours creating published elsewhere, with absolutely no credit to you. Talk about awkward (and infuriating!).
To save yourself from situations like this, we recommend watermarking your photos in such a way that anyone who wants to share it (or try to claim it as their own) can’t deny that you were the original source. Thankfully, with BeFunky’s Photo Editor it’s incredibly easy to create watermarks for your photos and incorporate them seamlessly into your blogging workflow! We’ll talk about the benefits of watermarks, plus show you two ways you can easily watermark photos with BeFunky. Let’s get started!
Why You Should Watermark Your Blog Photos
If you’ve ever found yourself in the above situation, you know how gut wrenching it can be. In fact, having your photos stolen can make you feel incredibly vulnerable. Although watermarking is an extra step in the photo editing process, it’s beneficial for a few reasons:
Protection Against Plagiary
Even the most popular blogs have been victims of theft. From photos to recipes and copy, there are people who set out to plagiarize on a daily basis.

Having your photos subtly (yet strategically) watermarked won’t necessarily prevent your photo from being stolen, but the watermark will indicate the original source of the work. It might also ward off plagiarizers from stealing it in the first place, so that’s a win win.
Drive Traffic To Your Site
When your readers Pin photos from your site, a lovely little path can be traced right back to your site from their Pinterest board via the URL that copies over. However, if the link is broken in any way, the photo that’s been Pinned doesn’t indicate where it originally came from - unless there’s a watermark on your photo.
Brand Your Photos
Remember how we keep talking about the importance of consistency in your branding? The same rules apply to your watermarks! Using the same watermark on your photos will help create brand recognition.

Now that you know why watermarking can be beneficial for your blog photos, we’ll show you two ways to create them in BeFunky: adding text watermarks or creating a logo watermark that you can use over and over again.
Watermarking By Adding Text To Photos
To watermark a photo by adding text, start by uploading a photo into BeFunky’s Photo Editor. You’ll find all the tools and effects you need to adjust exposure, enhance it with filters, remove unwanted objects, and more! When your photo is looking perfect, click on the Text tab in the menu on the left (the T symbol).
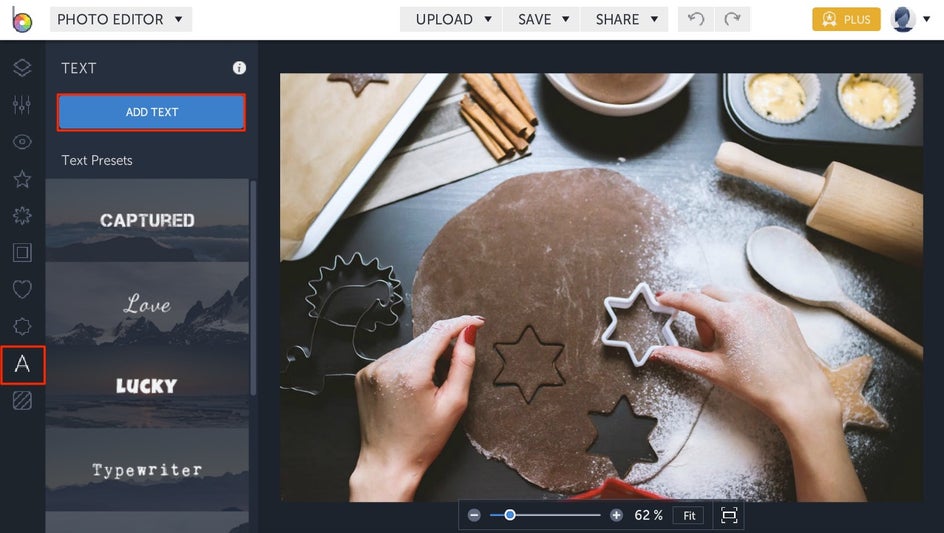
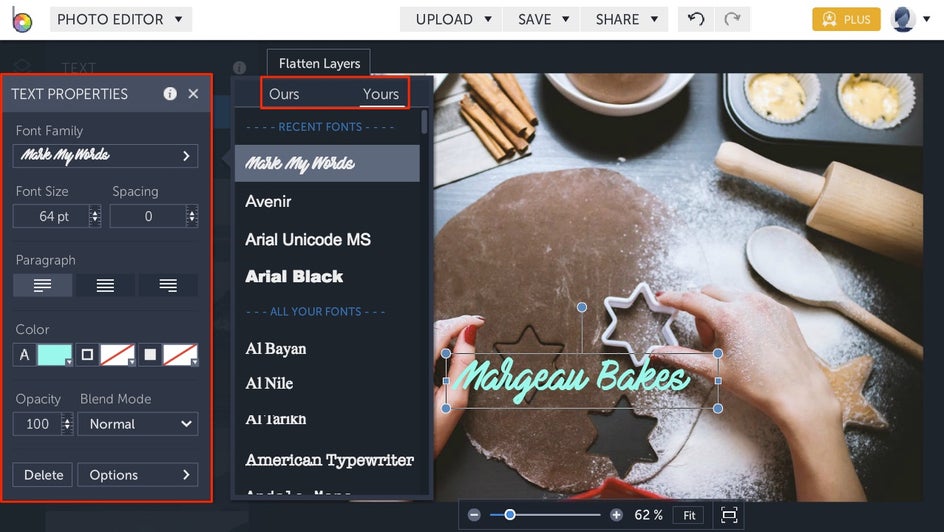
Once you’re in the Text tab, click the Add Text button at the top. You’ll be presented with a text box that you can click to start typing the name of your blog and/or site URL. Use the Text Properties toolbar that appears when your textbox is selected to alter the font, colors, opacity, and blend mode.

If you have a branded font that you use on your blog and want to keep the watermark text cohesive, you can click the Yours tab in the Font Family menu to access any font that’s stored on your Computer! You can click and drag the textbox wherever you’d like on your photo and use the blue circles around it to resize and rotate.
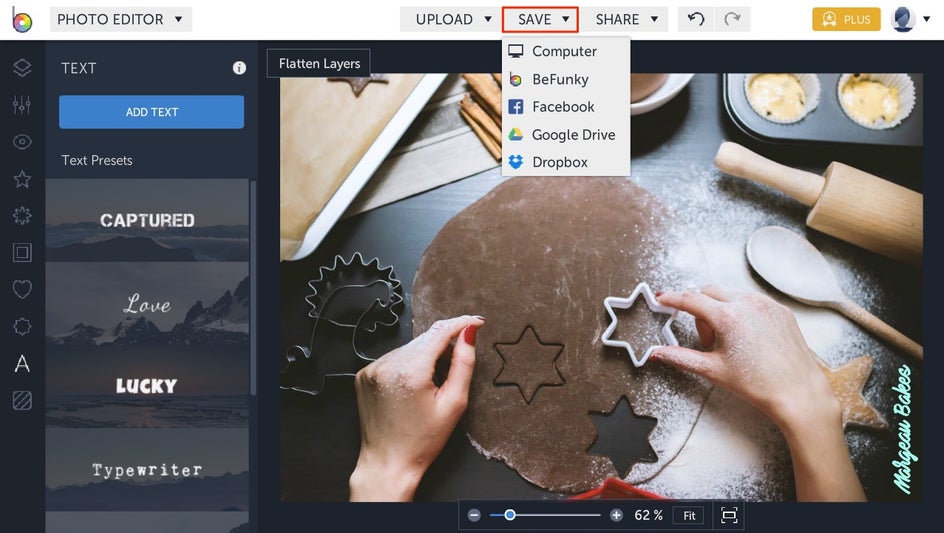
When your watermark looks on-brand and perfect, click the Save button at the top of the Photo Editor and save your image file to your chosen destination.
Watermarking With Your Logo
If you have an established brand with a logo design you’d like to use, you can easily add it to your blog photos with BeFunky! With your image uploaded in the Photo Editor, click on the Layer Manager tab (the first icon in the menu on the left). Then click the Add Layer button to upload your logo to your dashboard.
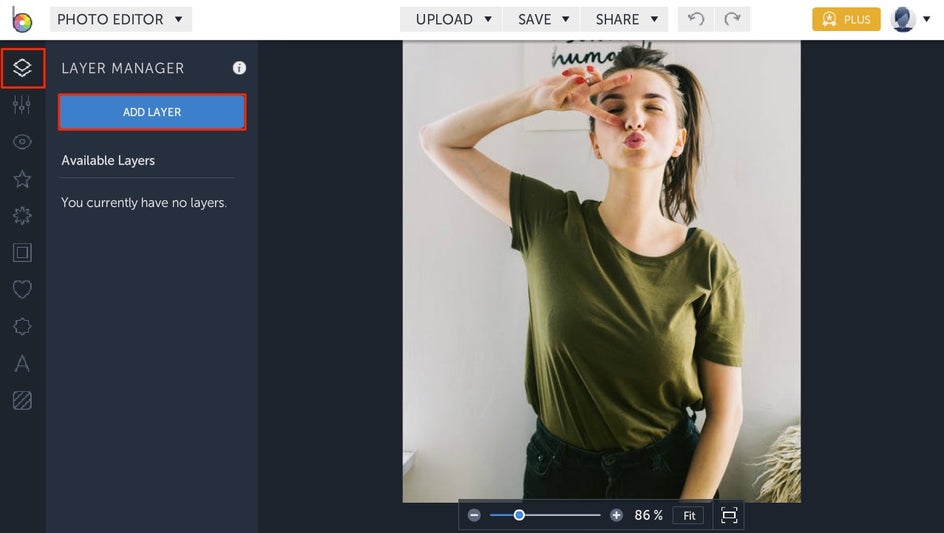
Your logo will be added as a thumbnail that you can double click to add to your photo. Using the blue circles around your logo, you can resize and rotate it however you wish. You can also click and drag it to reposition it on your photo.
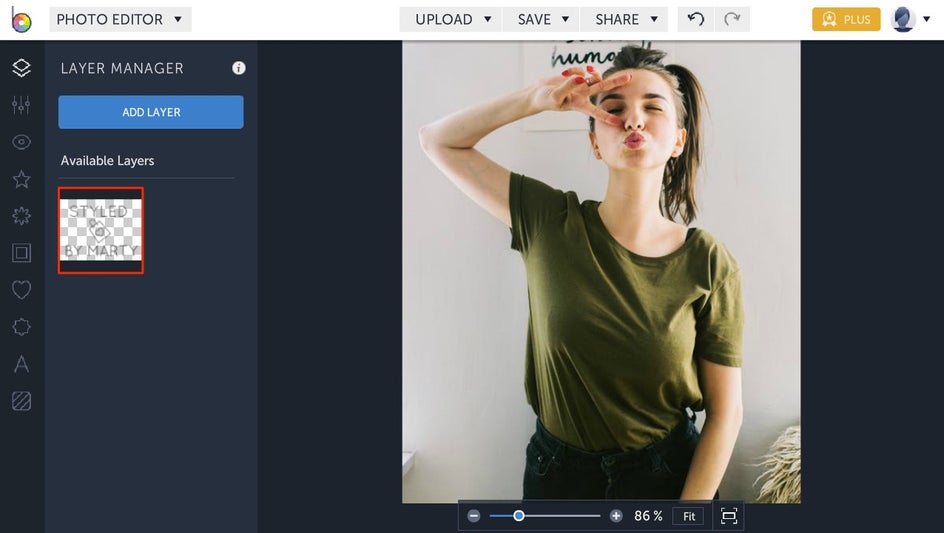
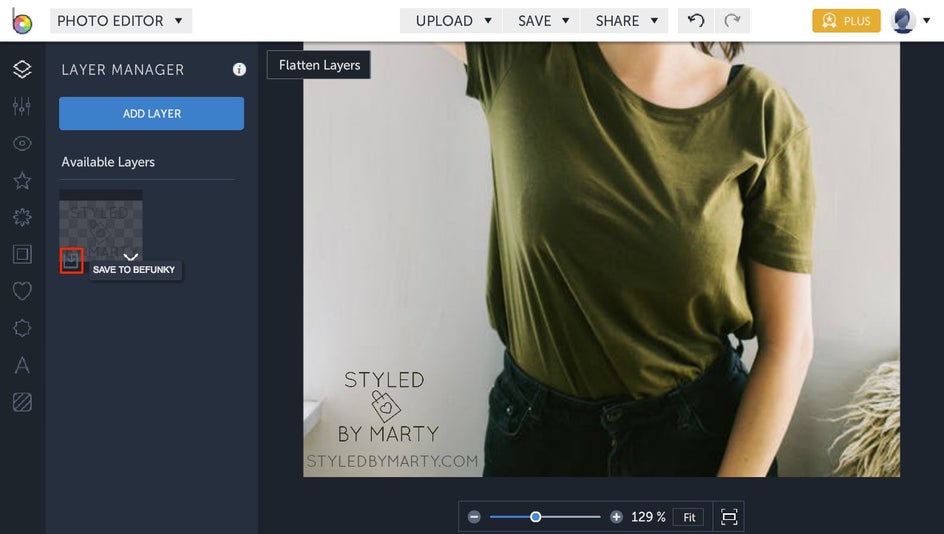
If you want to change the opacity or add a color overlay, use the Layer Properties toolbar that appears whenever your logo watermark is selected. Once you’ve got it looking just right, click the Save button at the top of the Photo Editor to save your photo to a chosen destination.

If you want to skip the process of uploading your logo as a layer every time you edit a photo, hover over the logo watermark thumbnail image in the Layer Manager tab. Click on the clipboard icon to select Save To BeFunky. This way, every time you upload a photo into the Photo Editor and head to the Layer Manager tab, your watermark will be there waiting.
Now that you know why it’s important to watermark your blog photos and how easy it is to do with BeFunky, you’ll be an unstoppable force of creativity in the blogging world! If you like the idea of a reusable watermark that’s always present in the BeFunky Layer Manager, but don’t exactly have a logo designed, you can easily create your own logo with text and graphics and follow the steps for saving it to the Layer Manager. That way, it can be added to a blog photo in seconds.