Should You Watermark Your Photos?

The scenario is all too common: you work hard to get the perfect shot, spend countless hours editing your photos, and upload your polished images to your blog, website, and social media. Sometimes only minutes later, you see your artistry reposted on another site or social media account, with absolutely no credit given to you. Ouch.
Although it’s common courtesy to ask for permission to use another person’s images (or at least tag the original owner), this step often gets missed. One of the best ways to protect your online images is to use a watermark that cites the source (that’s you!). This way, viewers will know exactly where the image originated. Lucky for you, BeFunky’s Photo Editor not only offers powerful tools for editing images to perfection, but also simple ways for watermarking them so you get all the credit.
Why Watermark Your Photos?
A watermark is a faint design that is placed as a layer on your image, featuring your company name, copyright, website URL, or logo. They’re meant to be a non-distracting addition to your photo that sites the source of your artistry. When you watermark photos, it’s like leaving a little trail of breadcrumbs that lead to the source of your work, and ensure that credit is given where it’s due. It’s an immediate indicator of the original artist, and some photographers believe it’s like signing your masterpiece.

Not only does a watermark help bring attention to the original maker of the image, it also offers a great opportunity to market your brand. The more viewers come across your images that are watermarked with your logo, company name, or URL, the more your brand awareness is increased. It’s especially important to use the same watermark in all of your work, so it becomes familiar to your audience.
Watermarking images in your blog posts and online content is especially powerful when viewers share your photos on social media sites like Pinterest, Twitter, and Instagram. It guarantees that when your audience hits the Share button, your content is instantly branded, regardless of whether or not the sharer grants you the common courtesy of tagging your company.

Now that you know why watermarks can benefit you, we’ll show you how simple they are to create. There are two ways you can watermark photos with BeFunky: design one from scratch or place a text watermark onto your photo. We’ll show you how to do it all in a few easy steps!
How To Design A Watermark From Scratch
Whether you’ve got a design in mind for your watermark or simply want to create as you go, making a watermark from scratch in BeFunky is easy. To get started, upload any photo into BeFunky’s Photo Editor and click on Background in the Edit panel. The photo you upload will serve as a transparent background, so don’t worry about the quality of the photo just yet.
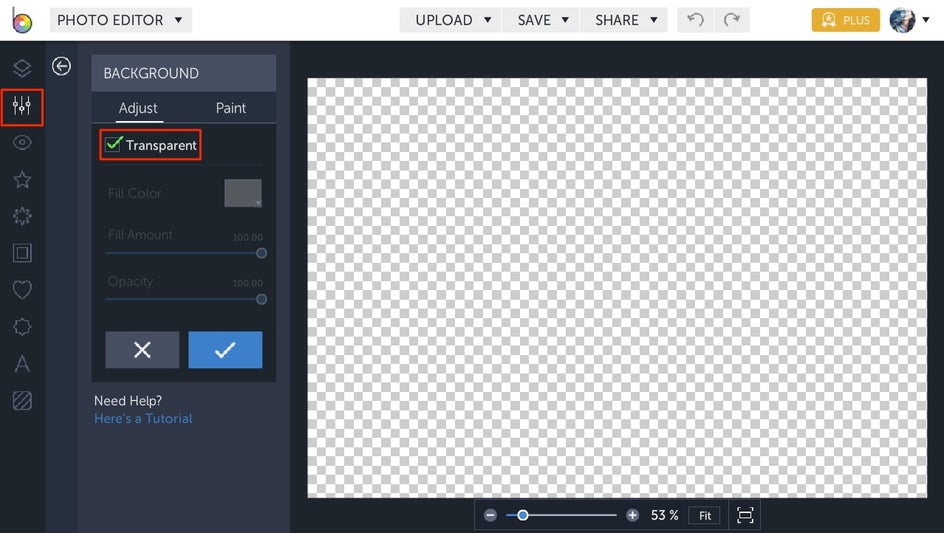
Clicking on the Background tool will automatically transform your photo into a checkerboard canvas. This is what you want as the checkerboard represents transparency, so click the blue checkmark to apply.
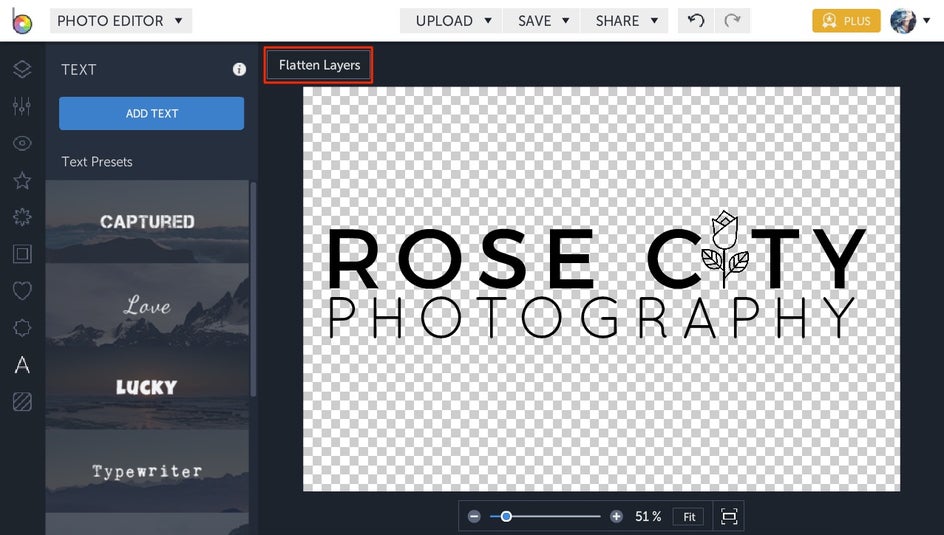
Here’s where the creative part comes into play. Let your imagination run wild as you add Text, Graphics, and overlays until you get your watermark looking just right. When you’re satisfied, click the Flatten Layers button in the top left corner of the Photo Editor canvas.
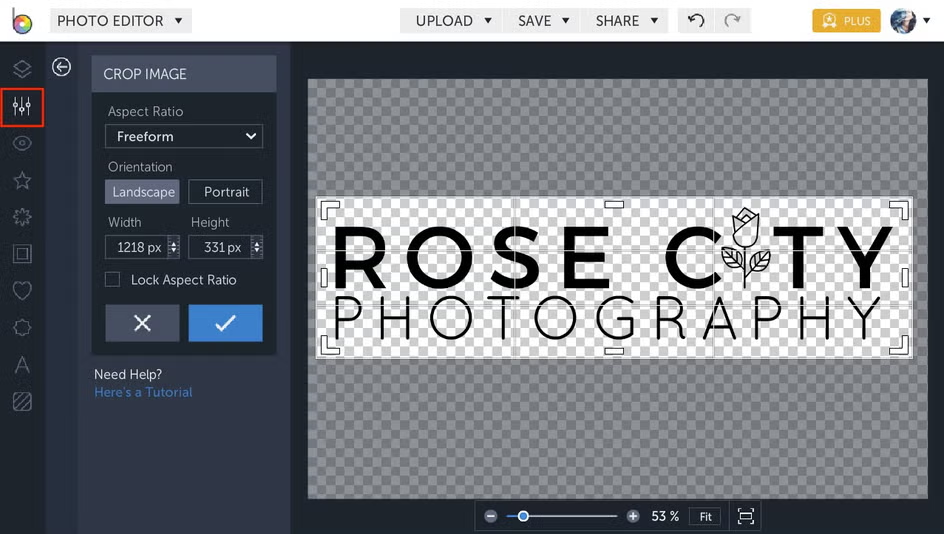
Next, head to the Crop tool in the Edit panel to crop the blank space surrounding your watermark. This is an extra step that makes your watermark more manageable when you’re adding it to future images.
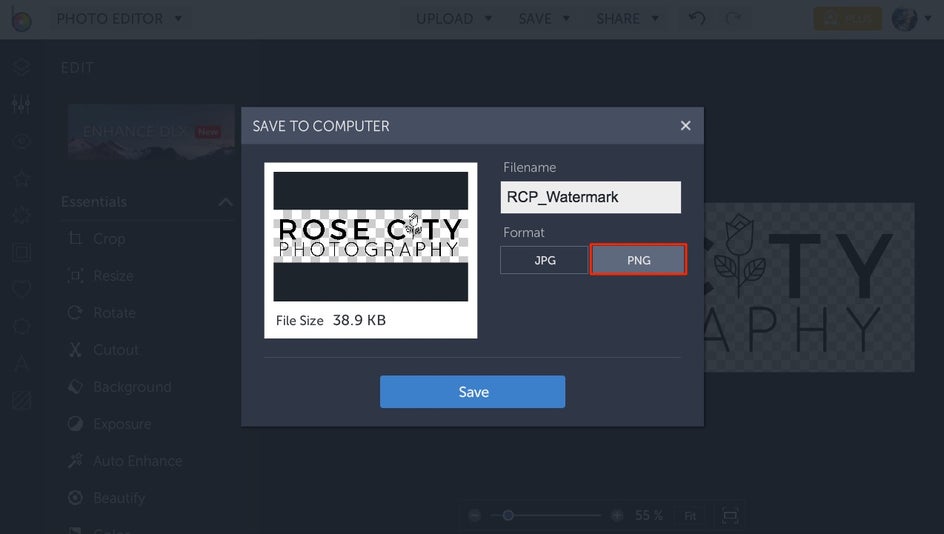
When you’re done cropping, click the Save button at the top of the Photo Editor and make sure to save your watermark as a .png file. This will ensure that the background remains transparent instead of defaulting to white.
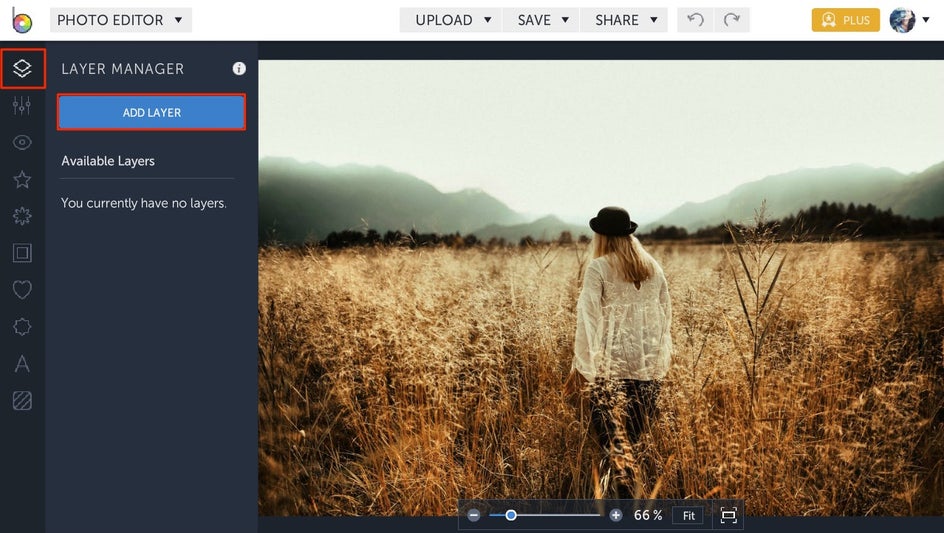
Now that you’ve got your watermark saved and ready to go, upload a photo that you’d like to add your watermark to. Click on the Layer Manager at the top of the left menu and click Add Layer, then choose the .png file you just saved.
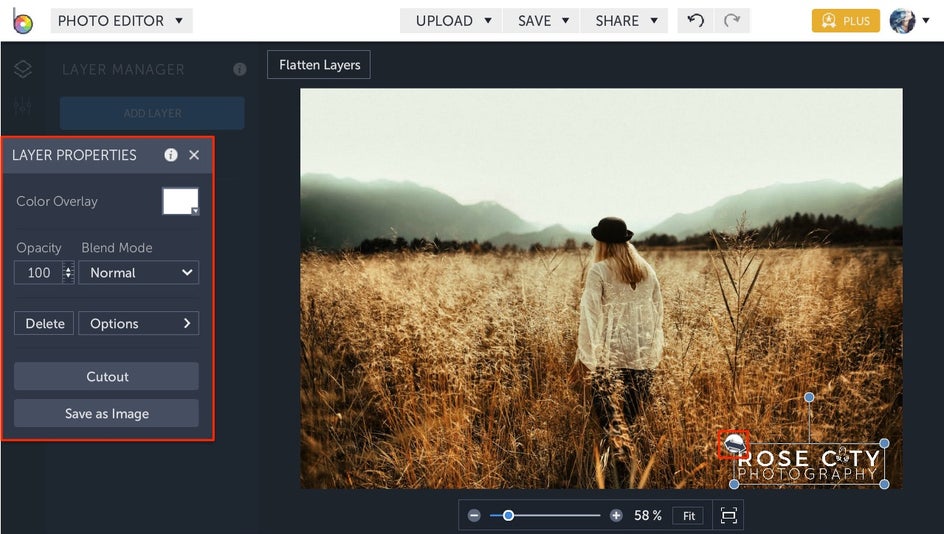
Drag and drop the watermark onto the image. From here, you can move it around your image and use the blue circles around it to resize. You'll notice that when your watermark is selected, a Layer Properties toolbar appears. There, you can change the Color Overlay and decrease the Opacity so it blends easily with the photo.
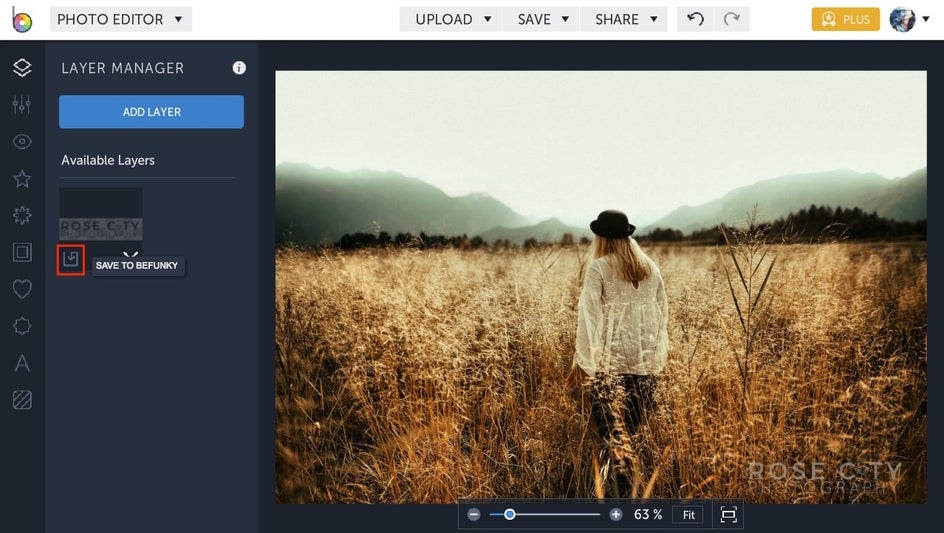
If you want to make sure your watermark is readily available every time you log in to the Photo Editor, we have a hack for you! Simply hover over the watermark thumbnail in the Layer Manager until you see a download icon in the bottom left corner of the thumbnail. Clicking this icon will allow you to Save To BeFunky, so you can easily access it from the Layer Manager when you want to watermark photos in the future!
Once you've got your watermark looking just right, you can use the Save button at the top of the Photo Editor to save your watermarked photo to your Computer, Dropbox, and more. Alternatively, if you want to share it straight to your social media channels like Facebook, Twitter, and Pinterest, you can click the Share button for instant posting. Too easy!

How To Watermark Photos With Text
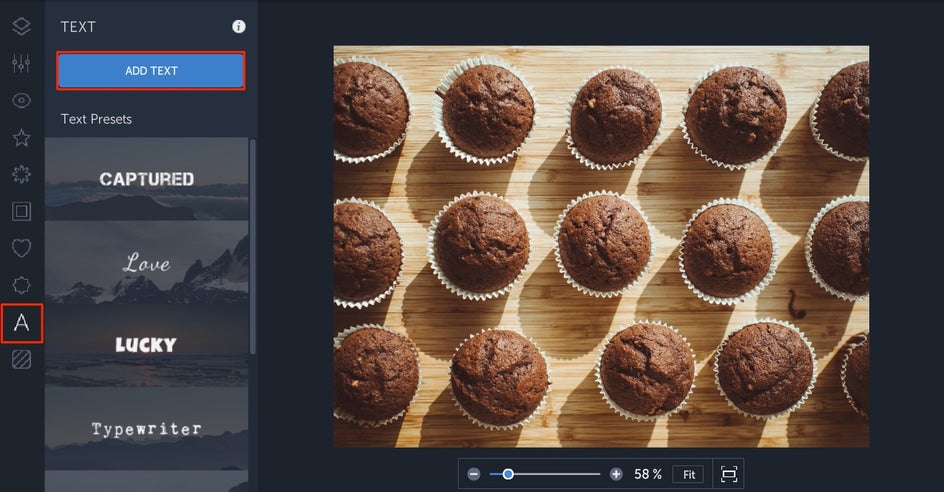
If you’re looking for a really quick way to add a company name or website URL to a photo, this one’s for you. Upload a photo and select the Text tab in the left side menu. Click the Add Text button and a text box will appear on your photo.
Click on the text box and type your watermark. You’ll notice that when your text box is selected, a Text Properties menu appears. This is where you can change the font color, font family, Opacity, Blend Mode and more! BeFunky offers tons of free fonts in the Ours tab, but if you have a font you’d like to use that’s stored on your computer (including ones you’ve downloaded), click on the Yours tab and select it from the dropdown list.
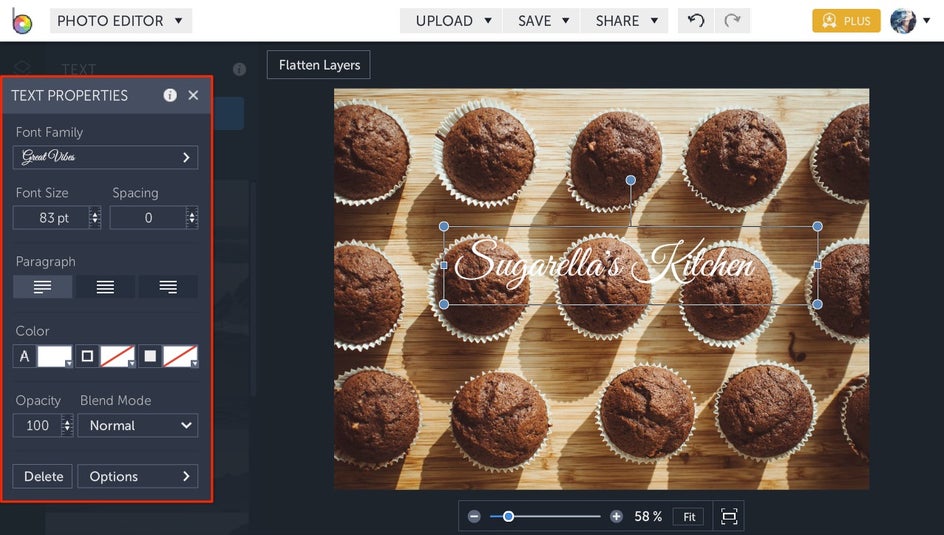
You can reposition the text box by dragging it around your image or resize it using the blue circles on the edges of the text box. To reduce distractions, we recommend decreasing the Opacity to make the text look more naturally blended with the photo.
And just like that, you’ve got an effective text watermark in just a few minutes!

Some Watermark Tips For Success
Now that you know how simple it is to watermark photos with BeFunky, here are a few tips to keep in mind:
Keep It Natural. The placement of your watermark should be as natural as possible, so it doesn’t distract from your photo. Consider the bottom right or left corners as opposed to the center of the photograph.
Keep It Minimal. In addition to resizing the watermark so that it’s small (yet legible), consider decreasing the opacity to make it blend into the photo. It shouldn’t be the main focal point of your photo, but it should still serve as a good signpost to the source of your work.
Keep It Memorable. Be sure to use the same watermark in your photos to keep things consistent. The more familiar your audience is with your watermark, the more your brand awareness increases!
You're on your way to watermarking photos with ease! Click the link below to design a watermark that will help protect and market your images, all in a matter of minutes.