Your Guide to Creating Custom YouTube Thumbnails

A YouTube video’s thumbnail is often the first interaction you have with a channel, making it a very important part of brand recognition. That’s why YouTube saturates viewers with thumbnail images. They appear on the homepage, after you’ve finished watching a video, and a selection of them are always docked on the right side of the screen.
These thumbnail images help viewers catch a glimpse of a channel’s video before clicking on it and are one of the most popular gateways to your channel. Since your videos are always surrounded by other thumbnails, it is important to make yours stand out from the rest!
Forget paying a hefty price on professional design, however. BeFunky’s YouTube Thumbnail Maker is home to a wide range of pre-designed templates for creating cohesive YouTube thumbnails for all of your videos. We’ll show you how!
How to Make Custom YouTube Thumbnails With BeFunky
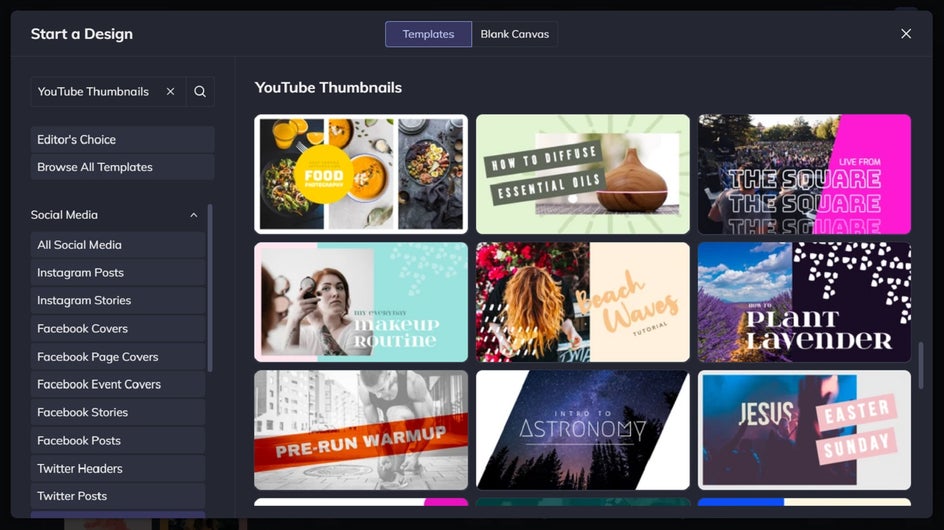
Ready to create your own YouTube Thumbnail? Head to the YouTube Thumbnail Maker to get started! This will take you directly to BeFunky’s library of YouTube Thumbnail templates, which are perfectly sized, according to the platform’s specifications.
Step 1: Choose a YouTube Thumbnail Template
Click on a template that takes your fancy, then select Use This Template to get started.
Step 2: Upload Your Own Image
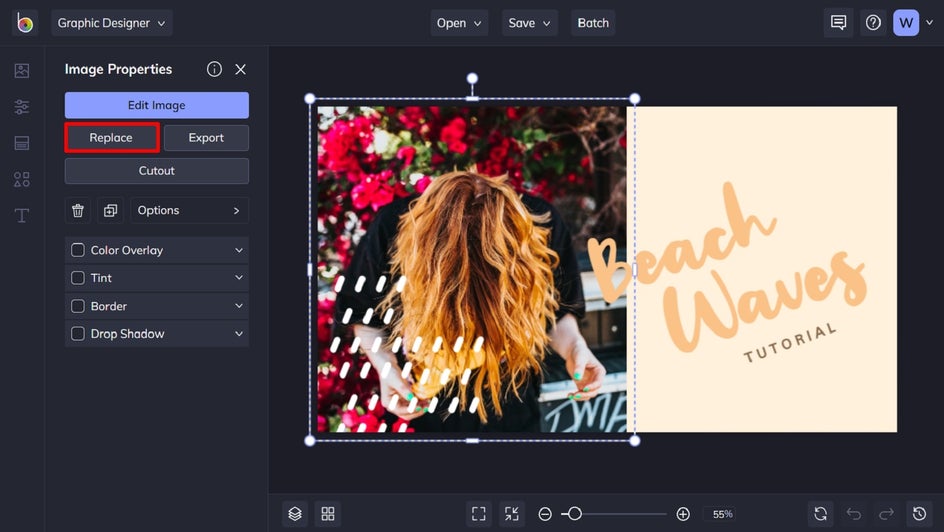
Firstly, you’ll want to swap out the template’s existing image for one that suits your own channel or branding. To do this, click on the image you wish to replace, and an Image Properties panel will appear. From this panel, click Replace, then choose an image from your own computer’s files, such as a screenshot of your video’s content.
Step 3: Edit the Text
Next, we’re going to edit the template’s existing text to represent your own YouTube video. To do this, simply double-click on any text box you wish to edit and begin typing. When you select a text box, you’ll also notice a Text Properties panel appears. From here, you can change things such as the font, font size, text color, spacing, and more.
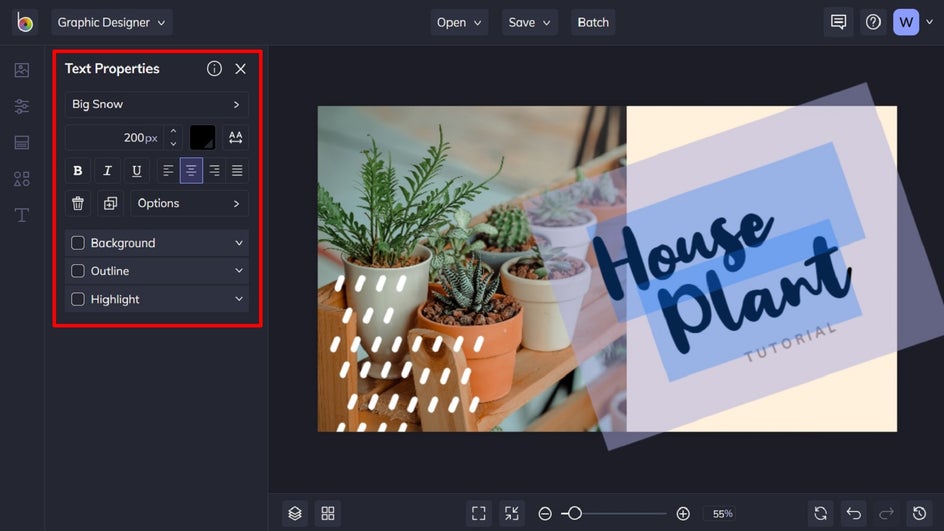
To change the color of the text, for example, click on the Text Color box and select a new color from the palette that appears. You can also use the Eye Dropper Tool to select a color already present in your template, or type in your specific color’s HEX code, if you know it.
Step 4: Delete or Adjust Any Unnecessary Elements
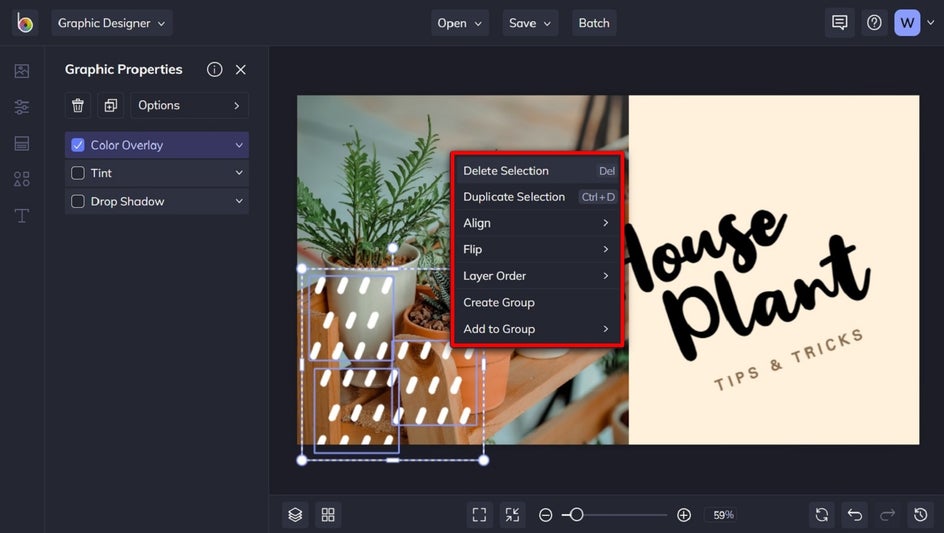
To get rid of any unwanted text or graphics on your template, simply select them with your mouse, then hit Delete on your keyboard. You can also right-click these elements to bring up a list of additional options, such as Alight, Flip, Layer Order, and more.
Step 5: Add Graphics
You also have the option to jazz up your YouTube Thumbnail Template with some graphics, such as shapes, symbols, lines, and more. To access BeFunky’s massive library of these, just click on Graphics in the main menu to the left, followed by Search Graphics.
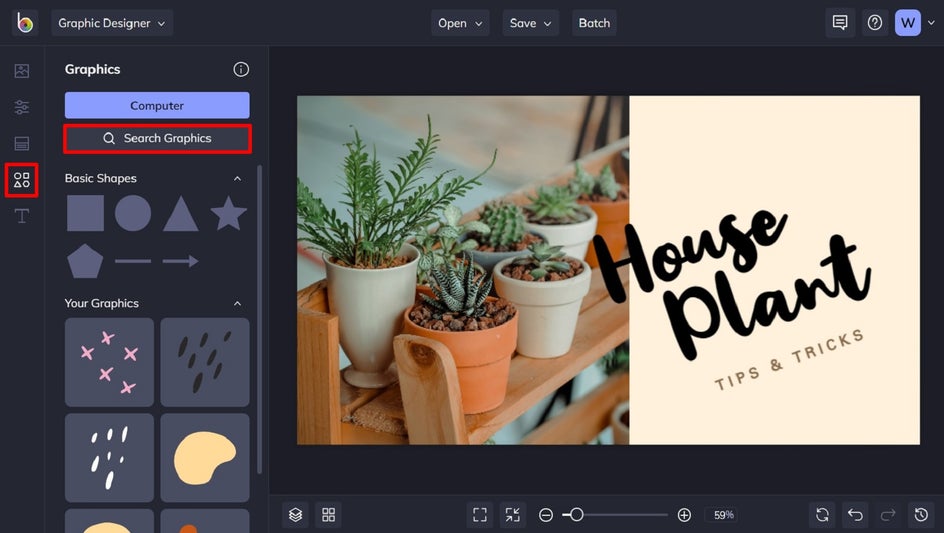
In the Graphic Library that appears, use the search bar, Style filters, and Popular Tags to find the type of graphics you're looking for – there are hundreds to choose from! Just click on all the ones you love to add them to your workspace. You'll find them in the Your Graphics section of the Graphics tab once you close out of the Graphic Library. Simply click and drag them onto your template where desired.
Step 6: Customize Your Graphics
You'll notice that any time you have a graphic selected on your template, you're able to resize and reshape it using the blue circles and white rectangles around it.
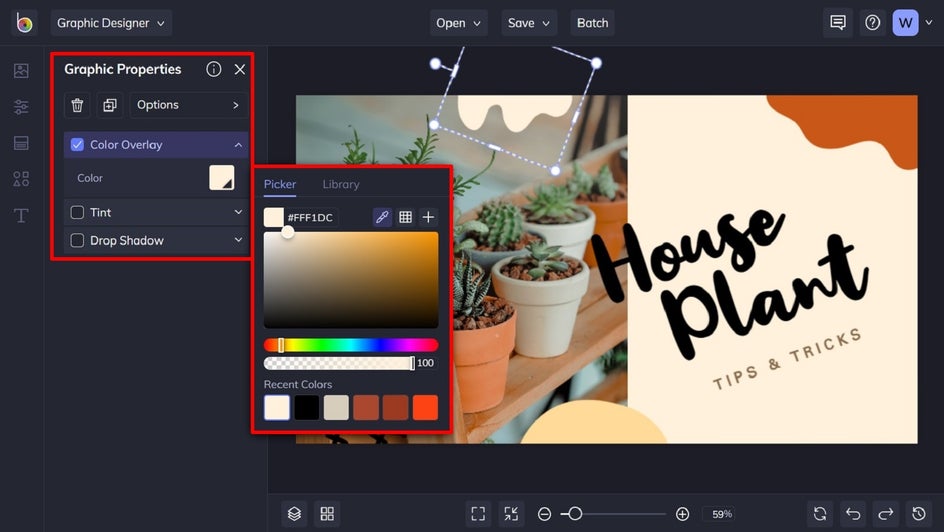
Additionally, you can use the Graphic Properties panel to customize graphics in a variety of ways. You can change the color of your graphics by selecting the square next to Color Overlay or Tint and choosing new hues, using the Options button to alter the Opacity, and more.
Step 7: Change the Background Color (If Necessary)
You can also change the background color of your template by navigating to the Customize tab in the main menu on the left. Select a color from the available swatches or choose a custom color by clicking on the first color swatch and choosing one from the color palette that appears. Again here, you can also use the Eye Dropper Tool or input a color HEX code to use as the background color.

Step 8: Save Your Custom YouTube Thumbnail
When you love how your YouTube Thumbnail looks, click the Save button at the top of the page, then select your desired save location.
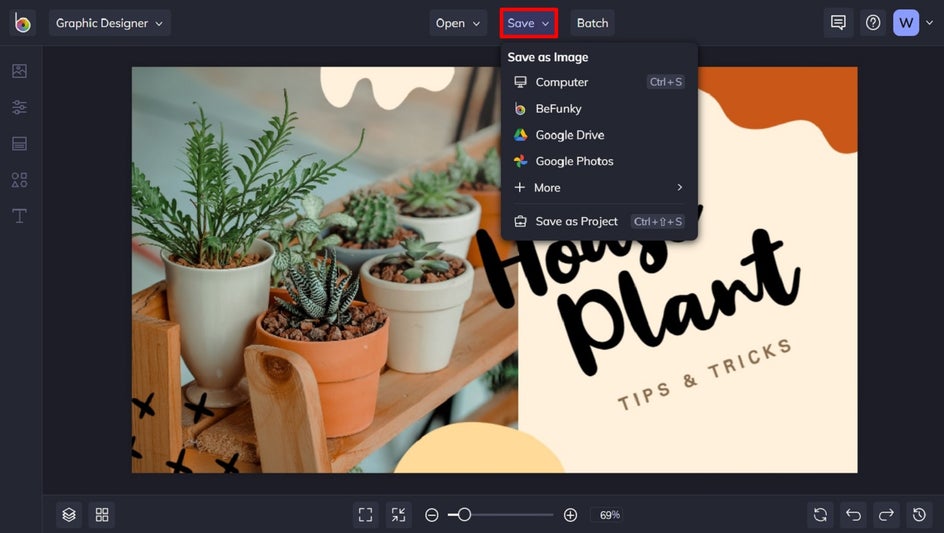
We also recommend using the Save as Project option, as this allows you to save your template as an editable BeFunky file. Then, you can easily revisit it in the future and swap out the text or images for your next YouTube video while keeping everything else on-brand.
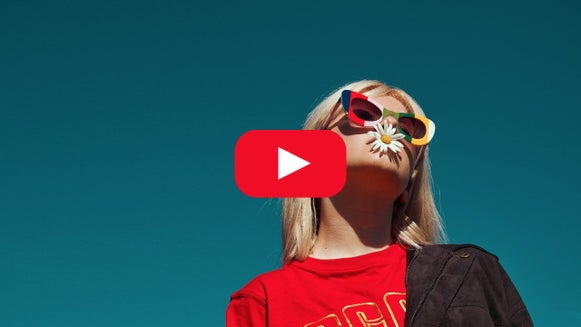
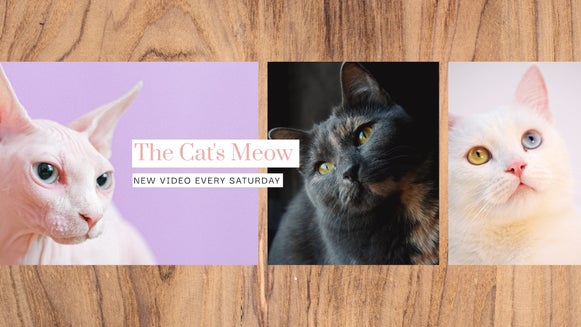
Final Results
With just a few minutes of your time, you too can create an engaging YouTube Thumbnail that puts your video content front and center!

Boost Your YouTube Channel With Eye-Catching Thumbnails
An eye-catching and cohesive YouTube channel is the key to getting more eyes on your content, and the most effective way to achieve this is through perfectly designed thumbnails. Thankfully, BeFunky's YouTube Thumbnail Maker designs the perfect covers for your video content in just minutes. Go on, try it for yourself!